Android Forensics Tutorial – Part 3 Data Acquisition Methods
Android Forensics Tutorial – Part 3 Data Acquisition Methods
In our previous Android Forensics Tutorials, we have learned about Directory structures of android and file system used by Android. Today we will learn about Android Data Acquisition Methods. So lets start third part of our android forensics tutorial.
Data Acquisition Methods
Data acquisition is the process of extracting data from the evidence. As we discussed earlier, data acquisition on mobile devices is not as simple as standard hard drive forensic acquisition. These data acquisition techniques are broadly divided into the following types.
Manual Acquisition:
The examiner utilizes the user interface of the mobile device to investigate the content. While browsing the device, the examiner takes pictures of each screen. This method does not require any tools to perform data acquisition. Apart from the advantages, the biggest disadvantage of this method is that only data visible to the users on the phone can be recovered, and obviously it is time consuming.
Physical Acquisition:
Similar to physical acquisition process on standard digital forensics, physical acquisition process on mobile devices creates a bit-by-bit copy of an entire file system. It creates a copy of the entire file system which contains data present on a device, including the deleted data and unallocated space.
Logical Acquisition:
Logical extraction acquires information from the device using the original equipment manufacturer application programming interface for synchronizing the phone’s contents with a personal computer.
Most of the tools available for free perform Logical Acquisition. Logical Acquisition is the process of extracting data that is accessible to the users of the device and hence it cannot acquire deleted data or the data in unallocated space. The above statement has limitations in some cases.
Imaging an SD card with FTK Imager
FTK Imager can be downloaded from the link.
It is important to get a bit by bit copy of the phone’s SD card, since it can be used as a valuable data treasure during investigations. As a best practice, we need to use a write blocker to maintain integrity of the evidence.
SD cards generally are of the FAT32 file system. So, we can use traditional imaging tools and acquire the image of the SD card. In this section, we are going to use a popular tool known as FTK Imager to get the image of the SD card.
Here are the steps:
- Safely remove the SD card from the mobile device and connect it to the workstation using a card reader.
 3. Now, navigate to “File” and click “Create Disk Image” as shown below.
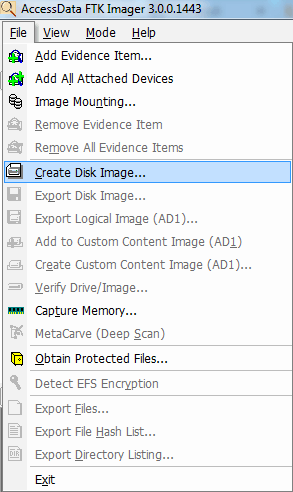
The above step opens a new window to select the type of acquisition.
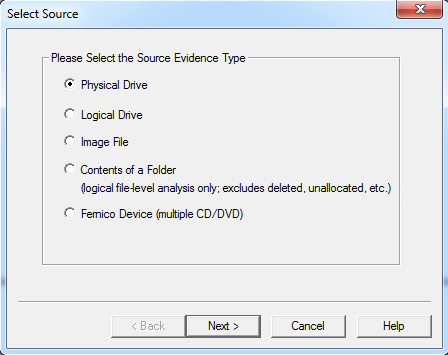
Since we are trying to create an image of the complete SD card, I have chosen “Physical Drive”. It opens a new window to select the Physical Drive as shown below.
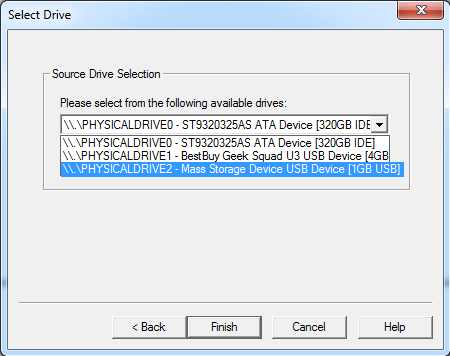
I have chosen “PHYSICALDRIVE 2″ of 1GB which in our case is the SD card. After selecting the appropriate option, click finish. It displays another window where we can add the destination as well as type of image to be created.
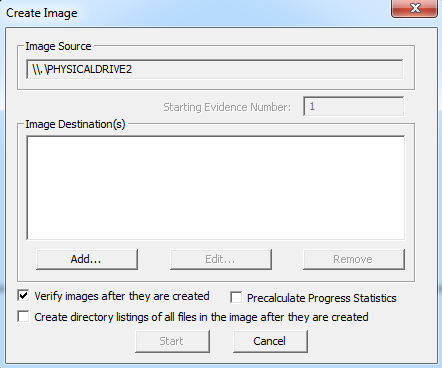
Upon clicking “Add” button, it opens a new window to select the destination image type.
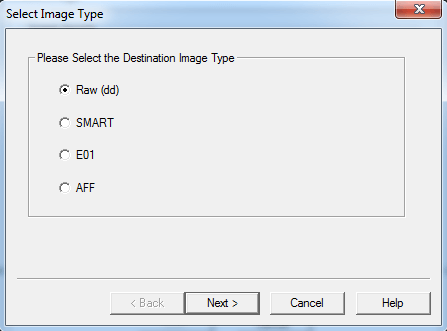
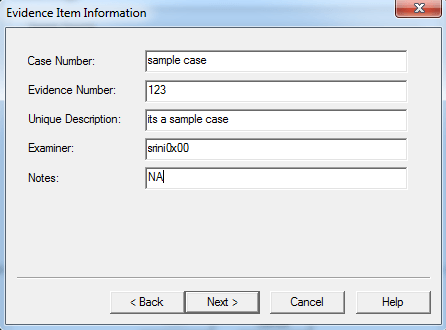
In our case, we choose “Raw” which gives a “dd” image. Unlike other image formats like “E01″, “dd” image will not store its metadata in the image. Upon clicking next, it shows another window where FTK Imager requests for Evidence Item Information. We can fill in the appropriate details and click “next” or skip it if we are doing it as a trail.
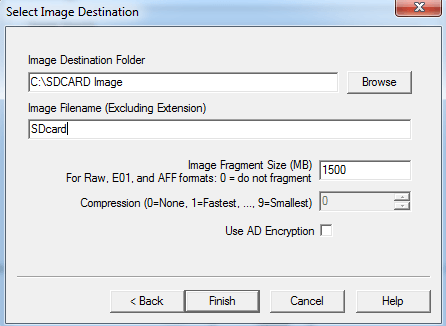
As we can see in the above figure, we have provided the destination path and name of the output file. Finally, click finish to start imaging.
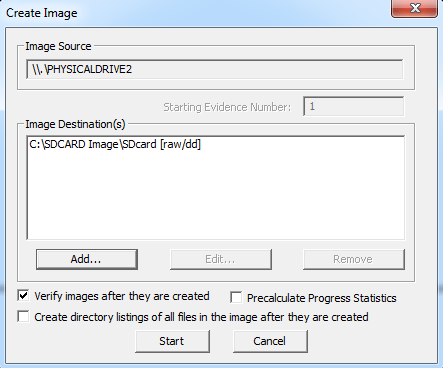
Click “start” to begin the process.
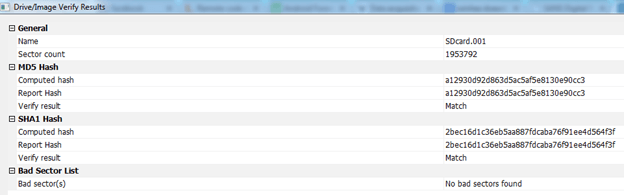
4. After finishing the process, FTK Imager displays a new window where it shows hash verification results. This is shown in the figure below.
Now, the created image can be further analyzed using traditional forensic analysis tools.
Imaging Android file system:
In this section, we will see how to perform data acquisition of Android file system partitions.
Note: in order to follow the below process, the device must be rooted.
We will use the popular “dd” tool to do our job. “dd” is present in Android by default in “/system/bin” location. This is shown in the following figure.

Now, let’s look at the partition locations of our interest using the mount command.
Following is the entry associated with “/data” partition from the above output.
Following is the entry associated with “/data” partition from the above output.
/dev/block/platform/msm_sdcc.3/by-num/p16 /data ext4 rw,nosuid,nodev,relatime,noauto_da_alloc,data=ordered 0 0
So, let’s use the following command to extract this particular partition using “dd“.
dd if=/dev/block/platform/msm_sdcc.3/by-num/p16 of=/mnt/sdcard/output.img
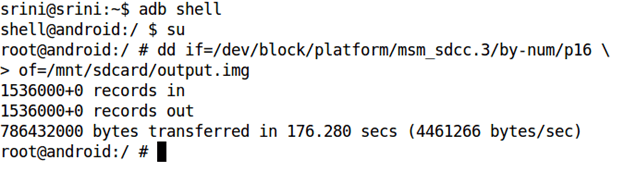
The above command is explained below.
if = input file
of = output file to be created
output.img = name of the output image to be created.
We can even specify the block size using the option “bs” in dd.
After finishing the above process, we can pull this file out using tools like Droid Explorer. We can even do it using the adb pull command.
The below screenshot shows the command to pull the image onto our workstation using the adb pull command.

Now, we can use this image to do our further analysis on the device.
!! Keep Learning !! Keep Connected !!
!! learn and share with friends !!

Comments